
GOEWS and Stacking. And AI Assistance.
Sat Jun 27, 2026I'm still doing various 3D modeling things. And since I've reached a certain point in this pursuit, the Ancient Texts dictate that I must try to organize my workspace using some modular, 3D-printed wall system. The available choices are, approximately
- MultiBoard which I'm inclined to reject on the basis of the license because I'm one of those nerds
- Honeycomb which is nice, but still has some license restrictions, and I've seen at least one creator I follow switch away from it
- Standard pegboards/IKEA boards with 3D printed holders. Both of which are pricier than printing my own and both of which are designed around either injection molded or metal holders (which means I'd need to be really conscious of layer direction when printing the actual attachments)
- GOEWS which has a fully open license, has really chonky, cleat-based mount points, still has a hexagonal layout option, and doesn't have any connection process between tiles (each tile unit has a hole for a wall-mount screw which means you literally just screw each one into the wall/board whatever and you're done)
So obviously, I'm going with that last one.
The Stacking Option
The issue everyone runs into with these systems is that you need to print a lot of tiles in order to cover a wall. The Next Layer deals with it by having a belt printer around, which I don't1. But there are other options if you've got access to multi-material printers or MMUs.
If you're printing something wide and short, with an evenish height throughout, then there's a trick you can pull to get more throughput per print. Instead of sitting around and detaching a tile every couple of hours then queueing up the next one, you can stack them like this. That is, you set up a slicer project where you have
- an instance of your object
- a separator layer (or appropriate geometry) printed in a filament that your main filament won't stick to (in the GOEWS case, we're printing the tiles out of PLA, so PETG is the natural separator layer)
- the next instance of your object
- repeat as much as you dare, up to a maximum of your printer's build volume Z-axis
That video I linked earlier shows you how to do this in Bambu Studio. However, I'm not a big Bambu Lab fan, and even if I were I'd prefer a more automated process than "fiddle around with your slicer for a few minutes whenever you want to stack some prints". Especially since there's an OpenSCAD implementation of GOEWS.
So, as of earlier this week, that OpenSCAD implementation has tile stacks built in.
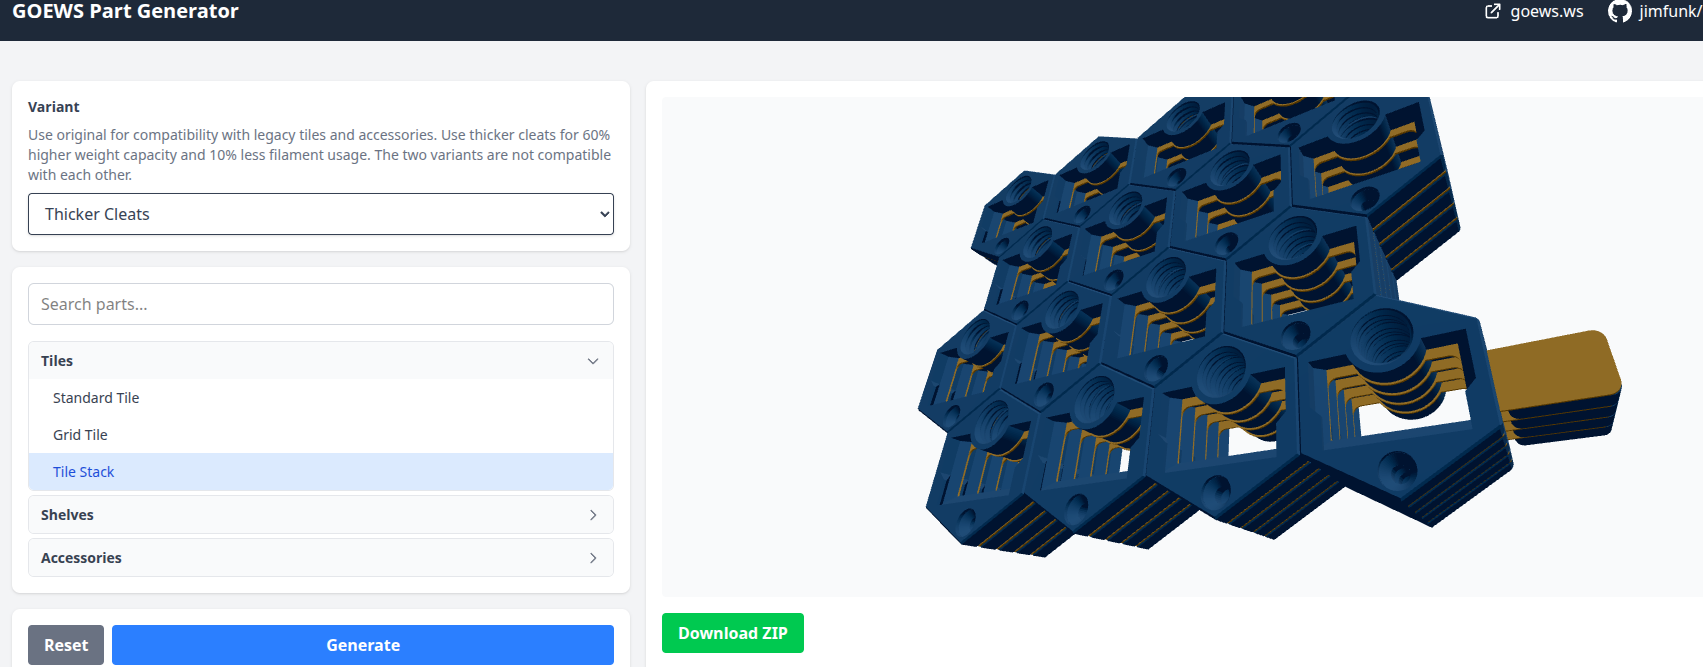
Instead of fiddling with Bambu Studio, you generate a tile stack using that web UI. This gives you two STL files (one for the tiles, one for the separators), then you hop over to OrcaSlicer, import both STLs as parts, and mark them as appropriate for your multi-material printer. Then you just slice and print it as usual. I ended up running off a few 5-stacks on my Snapmaker U1, which I thoroughly recommend. They're pretty good! I haven't explored saturating the build volume yet, but 5-at-a-time seems to work perfectly well for this application. The backs of the upper stacks are all a bit grungy, but that's to be expected given the PLA/PETG interactions. And also, we don't care; these are going up on a wall, with the grungy side facing the wall, and not coming back off.
In terms of empirics, I've been running off stacks between 5 and 8 successfully using PETG separators and PLA plates. My observations are
- keep the separator layers between 0.8mm and 1.0mm. Going thinner makes the PETG curl up and potentially cause some mid-stack adhesion issues. Going thicker makes the separator layers solid and stiff enough that they're really hard to peel apart. My most common setting is at 1.0mm exactly, and this hits the sweet spot of being thick enough to serve as a good platform for the rest of the stack and thin enough that it's easy to peel off after the fact
- probably enable printing infill first (or possibly even just disable walls for the separator objects); I've found it otherwise curls badly. It's not generally bad enough that it wrecks a stack, but why take chances?
- my max stack so far is 8, which isn't really worthwhile. 5/6 comes in at around 16-18 hours of printing which is a good enough time block that I don't need to worry about re-queuing a new job too frequently and also don't need to wait for multiple days to get the results out. A stack of 3-4 is good enough if you just want an overnight print you can wake up to in the morning.
- the longer your print is, the more likely there is to be some error somewhere in the middle of it. I haven't yet had a stack start well and then fail around item 3 or 4, but I have had weird situations with the second tile in the stack messing up in a noticeable enough way that I just ended up canceling the job and taking the first tile as a consolation prize.
If you've got a U1 of your own, or another multi-material printing option, hop over to the GOEWS generator and try it out; the change is already live.
AI Assistance
As is fast becoming tradition, that PR was heavily LLM-assisted. This was actually my first time ever interacting with Svelte. I wouldn't have chosen the tool myself, but the fact that I hadn't written it before didn't prevent me from having Claude and ChatGPT help me get my bearings and make pretty substantial changes to both the front-end and back-end of that server.
I notice two things here.
Firstly, I judge that this change probably would have taken me longer all-in without AI assistance. Because I'd have had to read through the existing scad code architecture, understood how to call the tile.scad file from tile-stack.scad, then understood enough about both Svelte and the generation server in order to make changes. And those changes would probably have been made with lower confidence. As it stands, I was able to skim through enough of the codebase to understand a couple of interfaces, then fed the makefile and a couple existing scad/python/svelte files into Claude's context, and had it make targeted changes/compositions that fit with the existing naming conventions. I suspect that to get to a minimum working patch that fixed my immediate problem, I probably would have taken a couple of days. In order to get to the polished, UI-finesse-tweaks-including PR, I realistically would have taken a week or two. Mostly because of my unfamiliarity with the codebase and frameworks. AI assistance brought that down to around an hour for the minimal patch, and about a working day for the full polished output. This still isn't proof, but it is more evidence of the effectiveness of the technique.
Secondly, this still felt annoyingly slow, in a way that normal development doesn't. Plausibly it's as simple as "when you're writing code manually, you're engaged the whole time, whereas AI-assisted coding involves a lot of dead time while we wait for the model to come back with a response". My subjective first-person experience here was definitely one of impatience, rather than one of moving at blazing speed. It also doesn't help that Claude's token limits feel pretty constraining. At one point in the process, I had to copy a bunch of context over into ChatGPT to continue the coding session. Plausibly this is good in the sense that focusing context sometimes helps results, but it's still annoying to hit a stop-sign, and have to move to a different lane. That's something I might be able to fix, and I'll see about it once I get past the other projects I've got lying around.
The next steps are maybe tooling my way out of the specific Claude dependence issue, and seeing how much wall I can cover in cleated hexes before finding another failure mode.
As always, I'll let you know how it goes.
And as a sidenote, I think this is probably a place where I'd have doubts about using one. You need to slice your print diagonally in order to get a belt printer working. Between the material properties of PLA, the diagonal layer "grain", and the weight I'm expecting to put on these, it might cause some catastrophic tile failure even with the chonk of GOEWS. Still; seems to have worked for TNL with honeycomb, so probably it would have worked for me too.↩
